Diy headlight restoration: the complete guide to restoring clarity, safety, and value
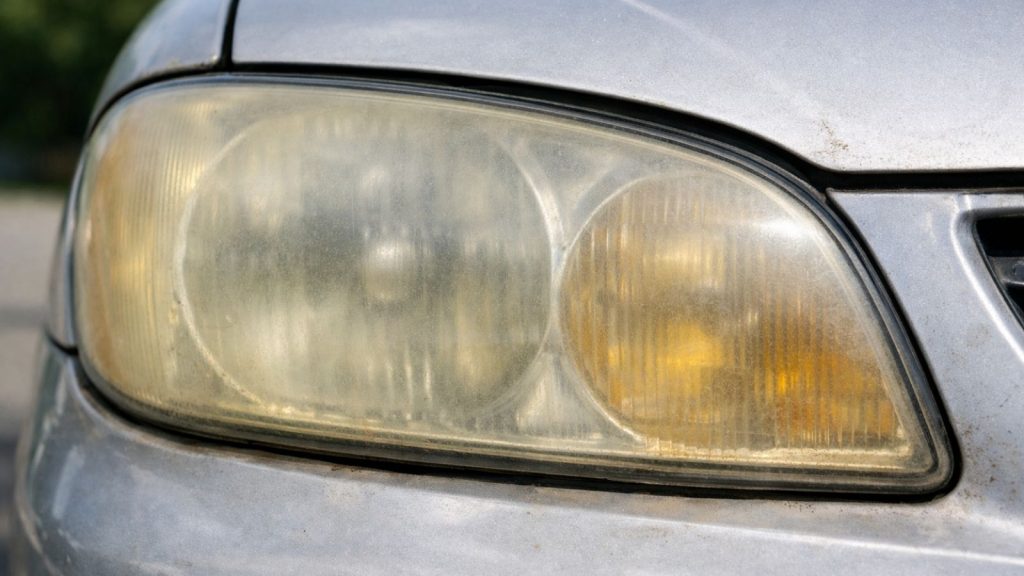
Cloudy or yellowed headlights are one of the most common-and most overlooked-automotive safety issues. As an automotive professional, I regularly inspect vehicles where headlight oxidation reduces nighttime visibility by 40% or more. Many drivers replace bulbs or blame weak lighting systems, when the real issue is degraded headlight lenses.
DIY headlight restoration has become a popular and cost‑effective solution because it restores clarity, improves safety, and extends the life of existing headlights without expensive replacements. When done correctly, DIY restoration can deliver professional‑level results at a fraction of the cost.
This pillar article serves as a complete expert guide and the central hub for six supporting satellite articles, each designed to target high‑intent search queries and affiliate monetization opportunities.
Why headlights become cloudy and yellow over time
Modern headlights are made from polycarbonate plastic, not glass. While polycarbonate is impact‑resistant and lightweight, it is highly vulnerable to ultraviolet (UV) radiation. To protect it, manufacturers apply a thin UV-resistant clear coat.
Over time, this coating degrades.
Main causes of headlight oxidation
- Prolonged UV exposure
- Road debris and micro‑scratches
- Harsh car wash chemicals
- Heat from headlight bulbs
- Pollution and environmental contaminants
Once oxidation forms, headlights develop:
- Yellow or brown discoloration
- Hazy or cloudy surfaces
- Significantly reduced light output
From a safety perspective, oxidized headlights directly reduce driver reaction time and increase accident risk during night and poor‑weather driving.
What diy headlight restoration really means
DIY headlight restoration is not simple cleaning. True restoration involves correcting surface damage and reapplying UV protection to restore optical clarity and prevent rapid re‑oxidation.
A proper restoration process includes:
- Surface leveling (sanding or polishing)
- Optical refinement (polishing compounds)
- Long‑term protection (UV sealant or ceramic coating)
When done correctly, DIY restoration can restore up to 90% of original clarity.
For a detailed beginner-friendly walkthrough, see:
👉Step-by-step diy headlight restoration for beginners
Diy headlight restoration methods compared
Not all DIY methods produce the same results. Understanding the differences helps avoid wasted time and money.
Cleaning-only methods (short-term fixes)
Examples include toothpaste, baking soda, and vinegar.
Pros
- Extremely low cost
- No tools required
Cons
- Cosmetic improvement only
- No UV protection
- Results last days or weeks
From a professional standpoint, these methods are not true restoration.
Headlight restoration kits (best diy option)
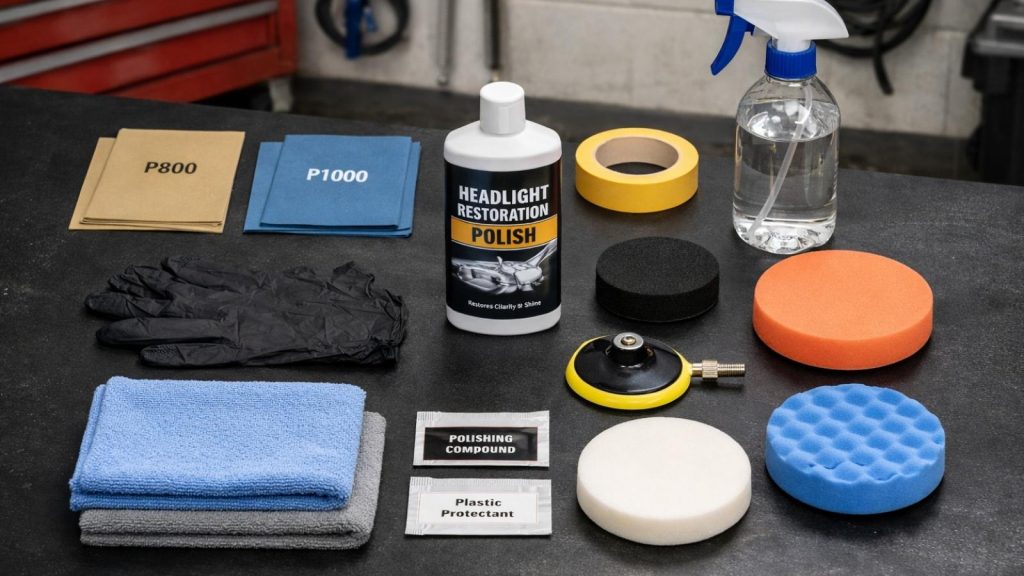
Restoration kits are specifically designed for polycarbonate headlights and offer the best balance between cost, effort, and results.
Typical kit components:
- Multi‑grit sanding pads or discs
- Polishing compound
- UV sealant or ceramic coating
- Hand or drill applicators
Pros
- Affordable ($15–$40)
- Consistent results
- Beginner‑friendly
Cons
- Durability depends on UV protection quality
To choose the right kit, see:
👉 Best diy headlight restoration kits for long-lasting results
Advanced diy sanding and polishing
This method closely mimics professional restoration.
Pros
- Best possible DIY clarity
- Effective for heavy oxidation
Cons
- Higher risk of mistakes
- Requires tools and experience
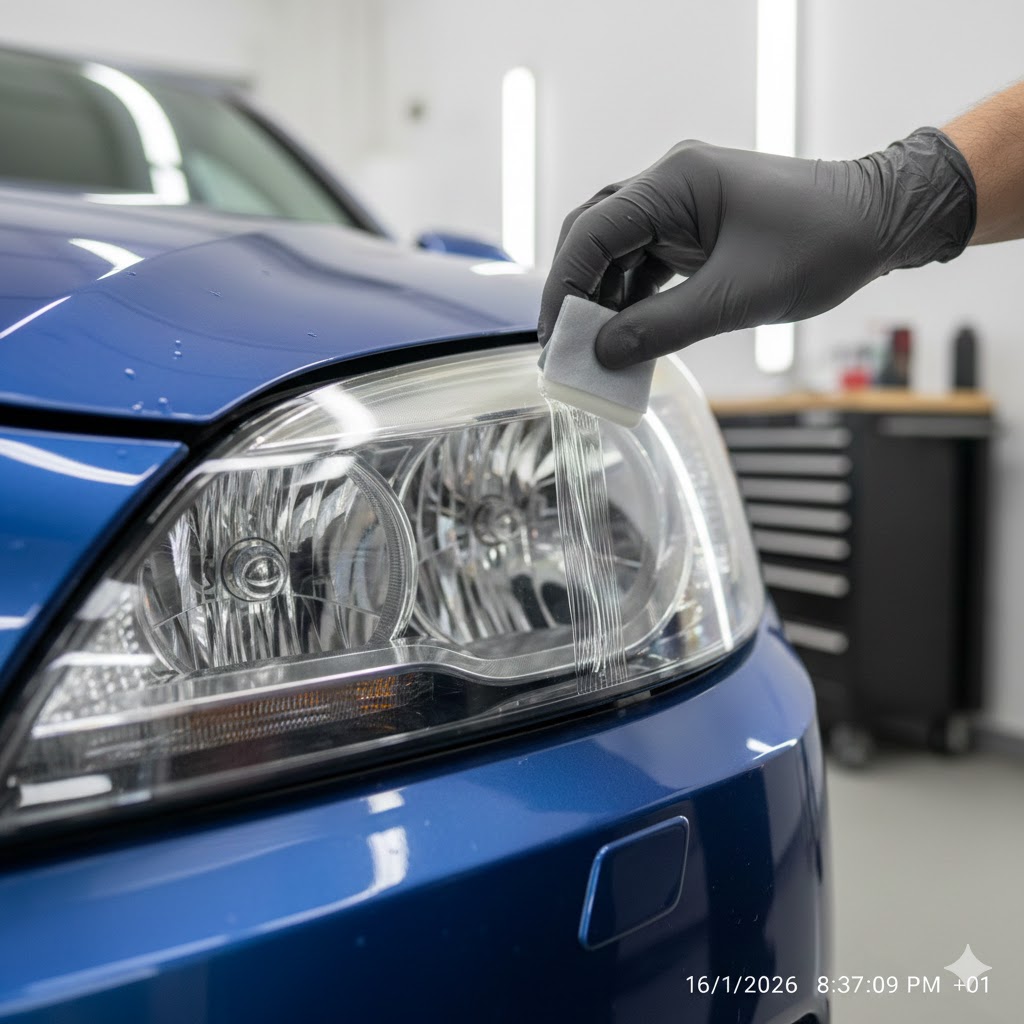
Step-by-step diy headlight restoration process
This expert-approved process delivers the most reliable DIY results.
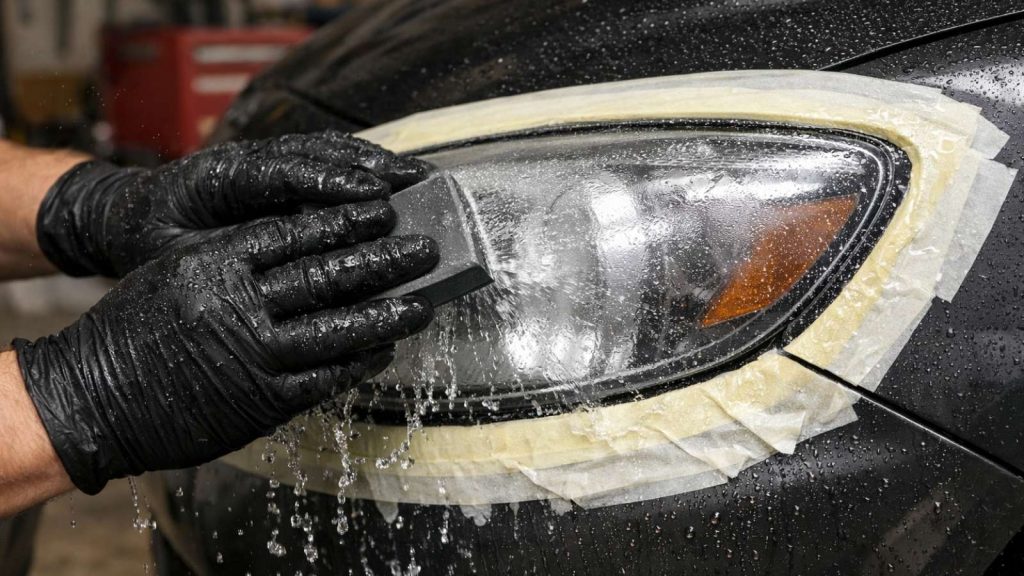
Step 1: Preparation
- Wash headlights thoroughly
- Dry completely
- Mask surrounding paint and trim
Step 2: Wet sanding
- Choose grit based on oxidation severity
- Keep the surface wet at all times
- Sand evenly in alternating directions
The lens should appear uniformly matte, not patchy.
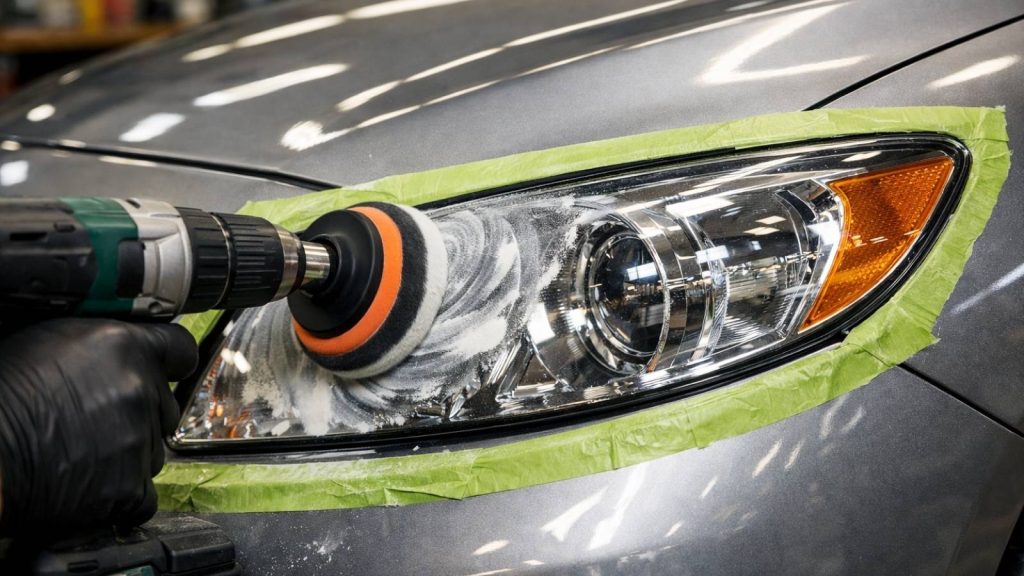
Step 3: Polishing
- Apply plastic or headlight polishing compound
- Use a drill or hand applicator
- Polish until clarity returns
This step restores transparency and light output.
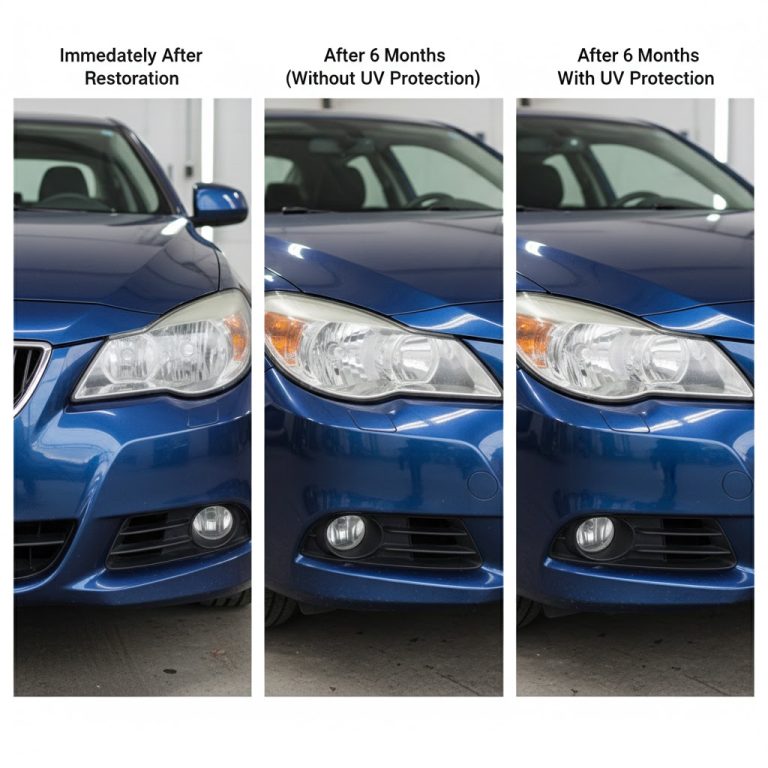
Step 4: Apply UV protection (critical step)
Without UV protection, oxidation returns quickly.
Effective options include:
- UV sealants
- Ceramic coatings
- Automotive clear coat (advanced users only)
UV protection determines how long restoration results last.
For durability expectations, see:
👉How long does diy headlight restoration last?
Diy vs professional headlight restoration
Many drivers struggle to decide between DIY and professional services.
Diy restoration
- Cost: $15–$40
- Time: 1–2 hours
- Durability: 6–18 months
Professional restoration
- Cost: $80–$150
- Time: 30–60 minutes
- Durability: 1–3 years
For a full breakdown, read:
👉 Diy vs professional headlight restoration: cost, safety, and durability
DIY restoration offers the best cost‑to‑value ratio, while professional service provides longer-lasting results with minimal effort.
Common diy headlight restoration mistakes
As an automotive expert, these are the most common DIY errors:
- Skipping sanding stages
- Uneven pressure while sanding
- Failing to apply UV protection
- Using household chemicals
- Over‑sanding edges and corners
One mistake can permanently damage the lens.
To avoid these errors, see:
👉 Common diy headlight restoration mistakes and how to avoid them
Is diy headlight restoration safe for modern vehicles?

Yes-when done correctly.
DIY restoration is safe for vehicles with:
- LED headlights
- Adaptive lighting systems
- ADAS technology
Because restoration affects only the outer lens surface, internal electronics are not impacted.
Avoid DIY restoration if:
- The lens is cracked
- Moisture is inside the housing
- Internal delamination is visible
For safety considerations, read:
👉 Is diy headlight restoration safe for modern vehicles?
Legal, safety, and inspection considerations
In many regions, cloudy headlights can:
- Cause vehicle inspection failure
- Result in fix‑it tickets
- Increase accident liability
Restored headlights improve:
- Nighttime visibility
- Road sign recognition
- Overall driving confidence
DIY restoration is also more environmentally friendly than full headlight replacement.
Final verdict: is diy headlight restoration worth it?
From a professional automotive perspective, DIY headlight restoration is absolutely worth it for most drivers.
Best for:
- Budget‑conscious owners
- Used car sellers
- Lease returns
- Preventive maintenance
Not ideal for:
- Severely damaged lenses
- Drivers wanting multi‑year results with zero maintenance
When paired with the right products and proper UV protection, DIY headlight restoration delivers excellent safety, value, and return on investment-making it one of the smartest DIY automotive maintenance tasks and a strong foundation for affiliate content.