How to check for flood damage and accident history
Flood-damaged and poorly repaired accident vehicles flood the used car market, often disguised through superficial cleaning and cosmetic fixes. Water intrusion causes electrical failures, mold growth, and corroded components that appear months after purchase. Meanwhile, improperly repaired collision damage compromises structural integrity and safety systems. Professional vehicle history reports provide crucial documentation, but physical inspection reveals what paperwork misses—mismatched paint, musty odors, water lines under carpets, and frame irregularities. Following a comprehensive used car buying guide methodology combines documentation review with hands-on inspection techniques that expose hidden damage before you commit financially.
the growing flood car problem
Hurricane seasons keep getting worse and flood-damaged vehicles keep entering the used car market in greater numbers. I’ve watched this problem escalate over the past decade. Unscrupulous sellers move flooded cars from disaster zones to dry states where buyers don’t think to check for water damage.
Insurance companies total flood-damaged vehicles and assign salvage titles in most cases. However some owners skip insurance claims entirely and sell damaged vehicles privately with clean titles. Others exploit title washing schemes moving cars between states with lax title laws to remove flood designations.
The financial incentive is massive. A flood-damaged car worth $3,000 as salvage can sell for $12,000 to unsuspecting buyers if the title appears clean. This profit margin drives a thriving criminal enterprise moving thousands of damaged vehicles annually.
Water damage creates problems that manifest months or years after purchase. Electrical systems corrode causing intermittent failures that are expensive to diagnose. Mold grows inside cabin insulation and HVAC systems creating health hazards. Mechanical components rust from inside out eventually failing catastrophically.
using vehicle history reports effectively
Carfax and AutoCheck provide valuable history data but they’re not foolproof. I always run both reports because they sometimes contain different information. One might show an accident the other missed or vice versa.
These reports compile data from insurance claims, police reports, repair shops, and state title agencies. They reveal prior accidents, flood damage designations, odometer discrepancies, and ownership history. However they only contain information that was reported to their data sources.
A vehicle history report showing clean history doesn’t guarantee the car wasn’t damaged. It means no one reported damage to databases these companies access. Private repairs paid out of pocket won’t appear. Minor accidents handled without police reports stay invisible. Flood damage in vehicles where owners skipped insurance claims remains hidden.
I focus on specific red flags in history reports beyond just accident and flood indicators. Multiple owners in short time periods suggest problems that caused rapid resale. Title transfers between states especially from flood-prone areas to dry regions raise suspicion. Gaps in service records might indicate periods where the car wasn’t drivable.
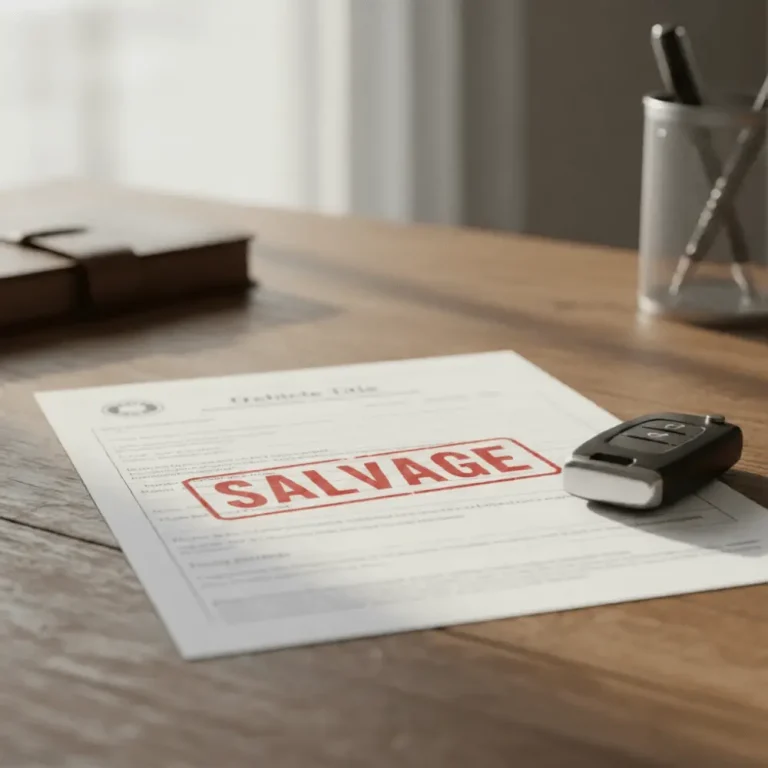
Salvage, rebuilt, or flood titles appearing in the history mean automatic rejection regardless of current condition. These designations indicate severe damage. Even professionally rebuilt salvage vehicles have compromised safety and diminished value.
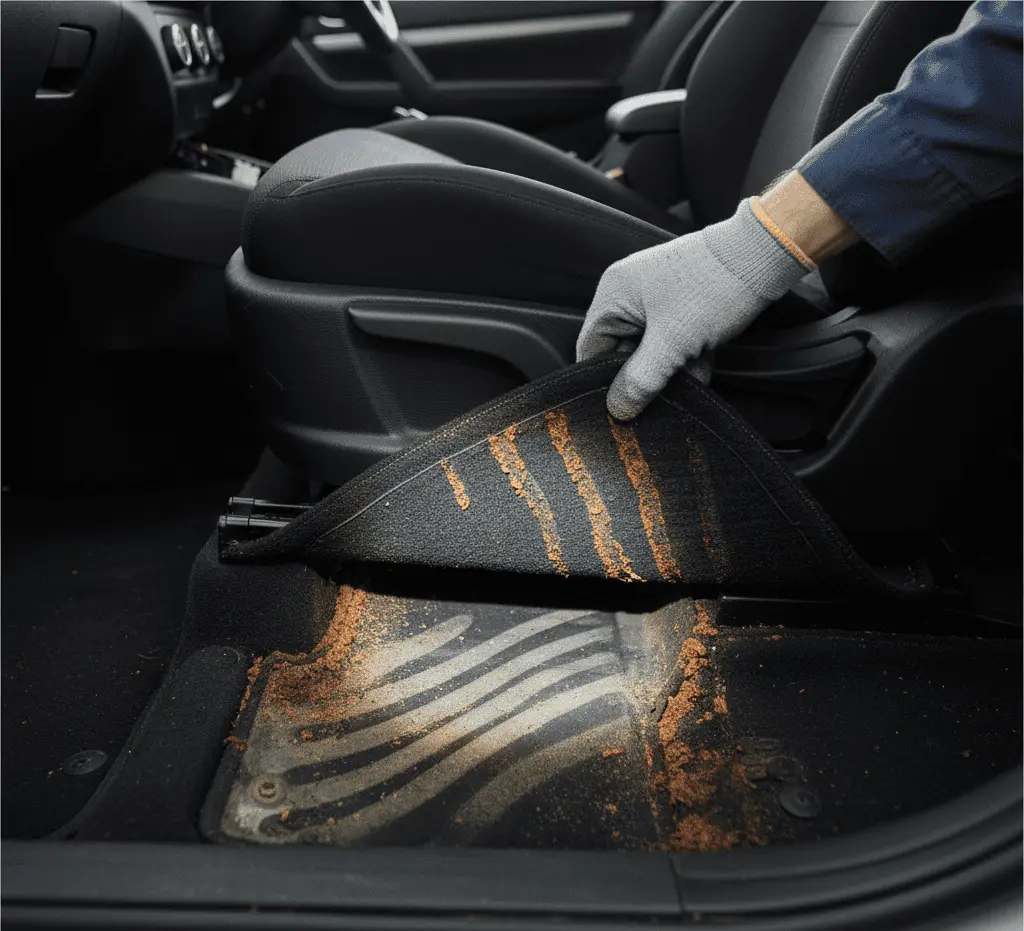
physical inspection for flood damage
Vehicle history reports provide documentation but physical inspection catches what paperwork misses. I developed a systematic flood damage inspection process after nearly buying a flooded Honda Civic five years ago. Only a thorough physical inspection revealed water damage the history report didn’t show.
Start with the obvious smell test. Open the doors and trunk and breathe deeply. Musty, moldy, or mildewy odors indicate water intrusion. Sellers use air fresheners heavily to mask these smells so be suspicious of overwhelming fragrance. I’ve opened trunks that smelled like a teenager’s gym locker which turned out to be flood cars.
Check carpets thoroughly especially in areas sellers can’t easily dry like under seats and in the trunk. Pull up floor mats and press firmly on carpets feeling for dampness or unusual stiffness. Flood-dried carpets often feel crunchy or stiff compared to normal carpet texture. Look for water lines or staining on carpet edges and seat fabric.
Inspect the trunk spare tire well and under the trunk mat. This area collects water in flood situations and sellers often neglect to clean it thoroughly. Look for rust, mud residue, or water staining. The spare tire itself might show rust on the rim if it sat in water.
Examine all seat mounting bolts and brackets. If these show recent removal evidenced by fresh tool marks or missing bolt caps someone recently pulled seats. Why would seats be removed unless the seller was trying to dry or replace water-damaged carpets?
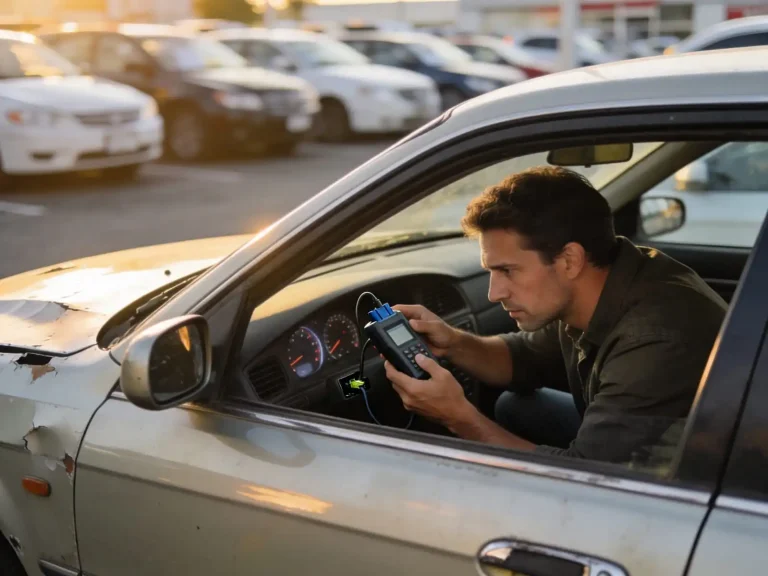
electrical system red flags
Water and electronics don’t mix. Flood damage reveals itself through electrical system problems more than any other symptom. I test every electrical component when inspecting for possible flood damage.

Start the vehicle and systematically test all electrical functions. Windows should operate smoothly without hesitation. Power locks should click decisively. Test each window and lock individually. Intermittent electrical failures indicate corroded connections or damaged modules.
Check all lights including headlights, taillights, brake lights, turn signals, and interior lights. Foggy or moisture-filled light assemblies suggest water intrusion. Remove headlight and taillight assemblies looking for water staining or corrosion if you can access them easily.
Inspect the gauge cluster for moisture or condensation behind the plastic cover. Gauge clusters are expensive to replace and moisture inside them indicates significant water intrusion. Test all gauges ensuring they respond properly to engine operation.
The radio and climate control system should function perfectly. Test all radio functions including AM, FM, and any satellite or digital features. Cycle through all climate control settings checking fan speeds, temperature control, and air distribution. Water-damaged HVAC controls malfunction in specific ways like stuck blend doors or failed blower motors.
Look under the dashboard for corrosion on wiring harnesses and electrical connectors. Bring a flashlight and inspect carefully. Green corrosion on copper wiring or white powdery corrosion on aluminum connections indicates water exposure. Check the fuse box for any signs of moisture or corrosion.
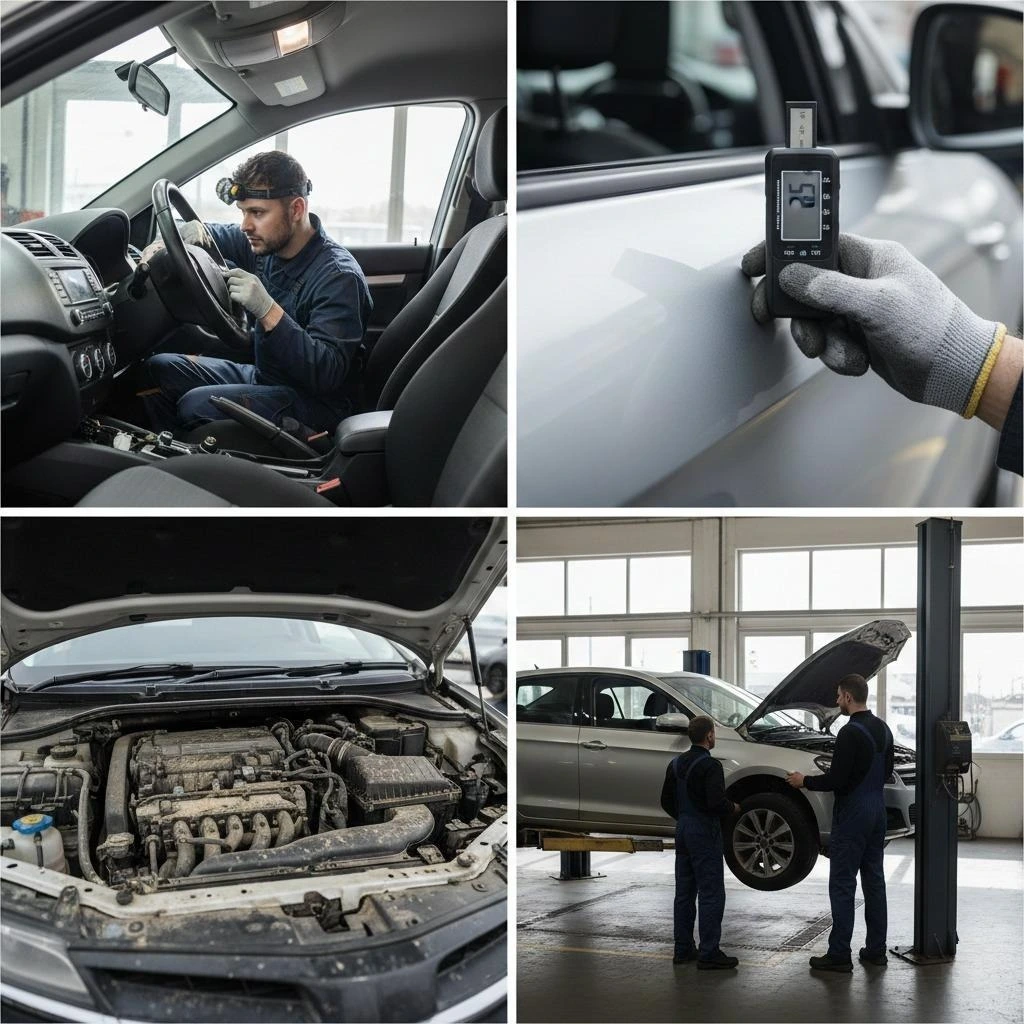
engine bay and mechanical inspection
Flood water leaves traces throughout the engine compartment that careful inspection reveals. Open the hood and look for mud, silt, or water staining in places water doesn’t normally reach during driving or car washing.
Check the air filter and air intake housing. Remove the air filter and inspect it for mud or water staining. Flood water entering the intake system causes catastrophic engine damage called hydrolocking. Evidence of water in the intake means the engine likely sustained serious damage.
Inspect all fluid reservoirs including oil, coolant, brake fluid, and power steering fluid. Water contamination creates a milky appearance in these fluids. Check the oil dipstick especially carefully. Creamy tan or milky oil indicates water mixing with oil usually from internal engine damage.
Look at wiring harnesses and electrical connectors throughout the engine bay. Water causes corrosion that appears as green buildup on copper or white powder on aluminum. Check grounds connections especially since these fail first when corroded.
Examine the radiator and condenser for mud or debris stuck between cooling fins. These components sit at the front of the vehicle and collect flood debris. Normal driving doesn’t pack mud deep into these areas but flooding does.
identifying poorly repaired accident damage
Accident history appears in vehicle reports when properly documented but quality of repairs doesn’t. I’ve seen numerous vehicles with disclosed accident history where repairs were done so poorly the car became unsafe despite looking acceptable.

Paint quality reveals repair history. Walk around the vehicle in good lighting examining paint for color variations between panels. Factory paint has consistent color, texture, and gloss across all body panels. Repaints often show slight color differences visible in sunlight.
Check panel gaps between doors, hood, trunk, and fenders. Factory assembly creates consistent gaps usually 3-5mm wide. Uneven gaps or panels that don’t align properly indicate collision damage and poor repair quality. I run my finger along panel gaps feeling for steps or misalignment invisible to the eye.
Open and close all doors, the hood, and the trunk. They should operate smoothly and latch securely without excessive force. Doors that require slamming or don’t close flush with surrounding panels suggest frame damage or poor repair.
Inspect door jambs and the area under the hood for overspray. This appears as paint mist on rubber seals, hinges, or other components that should remain unpainted. Overspray confirms the vehicle was repainted indicating either accident damage or rust repair.
Use a paint thickness gauge to measure paint depth across all body panels. These devices cost $100 to $300 and instantly reveal repainted areas. Factory paint measures 3-6 mils thick. Repainted areas often show 8-15 mils from primer, paint, and clear coat layers. Significant thickness variations between panels confirm repair work.
frame and structural damage assessment
The most serious accident damage affects structural components like the frame, unibody, or subframe. This damage compromises safety even when cosmetically repaired and dramatically reduces vehicle value.
Inspect the frame or unibody for evidence of straightening or repair. Look for ripples, wrinkles, or unusual welds along frame rails. Factory welds appear uniform and consistent. Repair welds look rougher and often show grinding marks nearby.
Check for frame paint overspray or fresh undercoating in isolated areas. Collision repair shops often repaint or undercoat repaired frame sections. This appears as different colored or textured coating compared to surrounding areas.
Measure distances between specific points on both sides of the vehicle. The distance from wheel well to door edge should match perfectly on driver and passenger sides. Differences indicate frame damage that shifted components out of alignment.
Professional frame inspection requires specialized measuring equipment. If I suspect frame damage based on visual inspection or history reports I pay $100 to $150 for professional frame measurement before proceeding with purchase.
combining peports and physical inspection
Neither vehicle history reports nor physical inspection alone provides complete protection. I use both methods together creating a comprehensive assessment before purchasing any used vehicle.
Start with history reports identifying disclosed damage and raising suspicion based on ownership patterns or location history. Then conduct thorough physical inspection specifically targeting the types of damage suggested by the history.
A car from Florida with three owners in two years gets extra scrutiny for flood damage even if the history report shows clean. I spend more time checking electrical systems and looking for water intrusion evidence.
Similarly a vehicle showing one accident in the history report receives detailed paint and frame inspection. I verify repair quality and ensure no hidden structural damage exists beyond what was disclosed.
Document everything during your inspection with photos and notes. This record helps during negotiations if you find undisclosed damage. It also provides protection if problems appear after purchase potentially supporting claims against sellers who concealed known issues.
After verifying clean history and structural integrity you can confidently complete your purchase. However conducting thorough DIY used car inspection with proper tools and techniques gives you the skills to evaluate vehicles independently without relying solely on professional inspections.